Create a full featured and compact Oracle Linux Virtualbox VM in 15 minutes
AKA: “Honey, I shrunk my Linux”
Overview
Linux VMs such as Oracle Linux 6.6 start with an install footprint of about 5GB. This makes it inconvenient to hand off to other people and you are constantly looking for bigger drives to hold the VM in.
How about we just cut out all the bits that are irrelevant to a VM - such as bluetooth, printing, wireless, firmwares, additional kernels and the likes?
Here is one way to do it.
How about we just cut out all the bits that are irrelevant to a VM - such as bluetooth, printing, wireless, firmwares, additional kernels and the likes?
Here is one way to do it.
- Get a list of rpms that is an absolute minimum
- Create a KickStart configuration file
- Host the kickstart cfg file on HFS or similar server
- Now, copy the drive over using CloneZilla - which only copies occupied bytes.
- All should be done in about half hour tops.
Pre install checks
Have the following ready:
- VirtualBox
- Oracle Linux 6.6
- You can also use PartedMagic - which contains a copy of CloneZilla from http://partedmagic.com/doku.php?id=start#.UXhGlFeOOjg
- KickStart cfg file :
Notes about Kickstart:
- Kickstart file is sensitive to the CR/LF in the file. Make sure that the file is saved as unix LF only otherwise the shell commands within will fail.
- Another user called 'oracle' is setup by the installation of the oracle-rdbms preinstall package.
- The kickstart cfg will:
- Allow you to set the hostname
- Set the root and oracle user passwords to 'password'
- Setup the second drive as /opt
- Create /opt/oracle and set the owner to 'oracle'
- Add user 'oracle' to sudoers file
- And importantly install only those bits that are needed.
- The kickstart file also does not setup the logical volume. For things like clonezilla, partitionmagic etc LVM is just beginning to be supported or not supported. This keeps setup friendly and easy.
- You can add a new hard drive once this is all done to host all your 'software'. This is a super simple step especially if you are not setting up LVM. It is just a simple mount setup in your fstab.
- The 6.6 Kickstart file uses 2 disks. Other than that all instructions are identical.
Installation:
Setup a new VirtualBox VM and pre-install steps
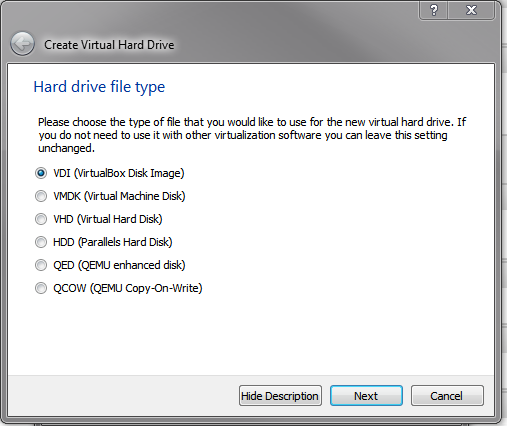
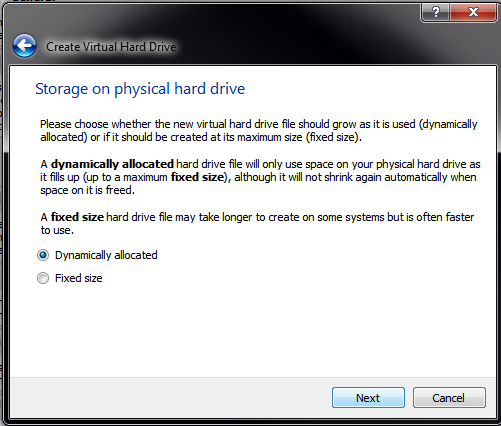
- Create a new VM image for the Oracle Linux VM: (img. not updated for 6.6)
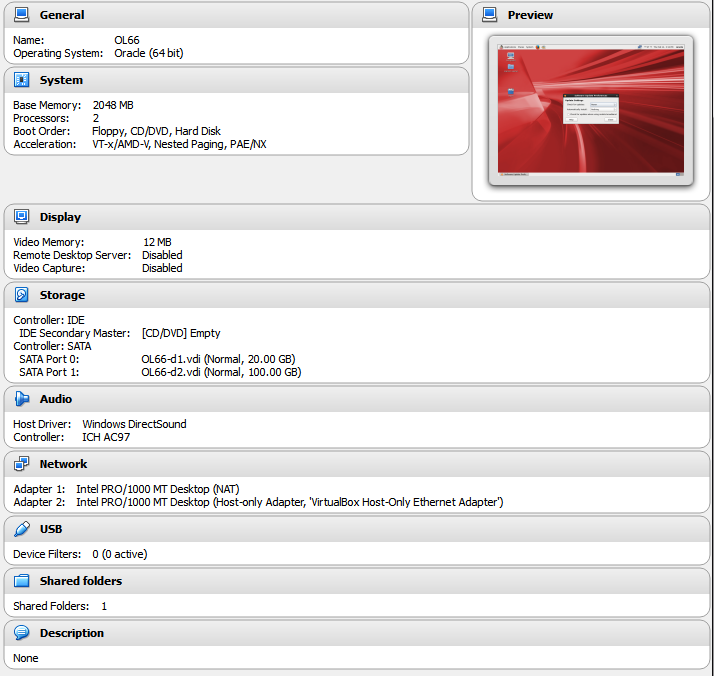
- Setup a single dynamically allocated 20gb drive. AND one 100GB drive. The 100GB drive will be mounted as /opt/

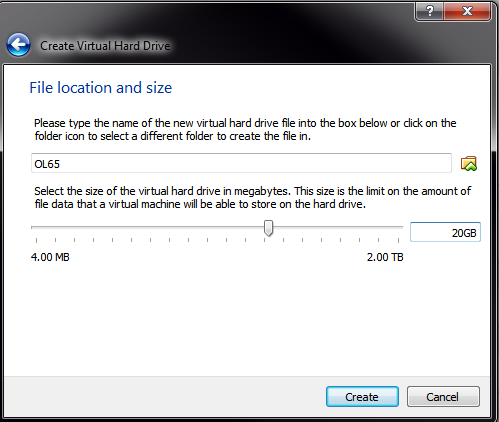
- I have started calling the first disk “Pre” since it will be swapped out by the skinny disk1 at the end of this process. I name the skinny one correctly as d1.
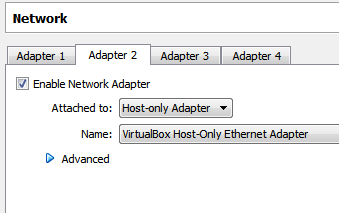
- Setup 2 network adapters, one for VM to look towards the internet and one to allow your host to access the VM (VirtualBox does not provide the translation that VMware does and many posts use this configuration to setup the VM).
- First network card is "NAT"
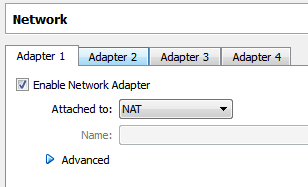
- Second is "Host Only"
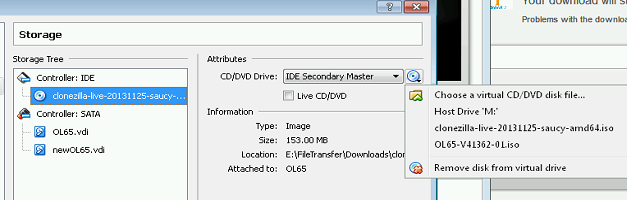
- Set the Oracle Linux ISO file in the 'drive'.

- It should finally look like
- Start HFS
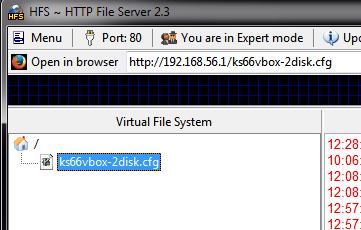
- Add the kickstart configuration file (drag and drop)
This completes the initial prep.
Installing Oracle Linux Using Kickstart
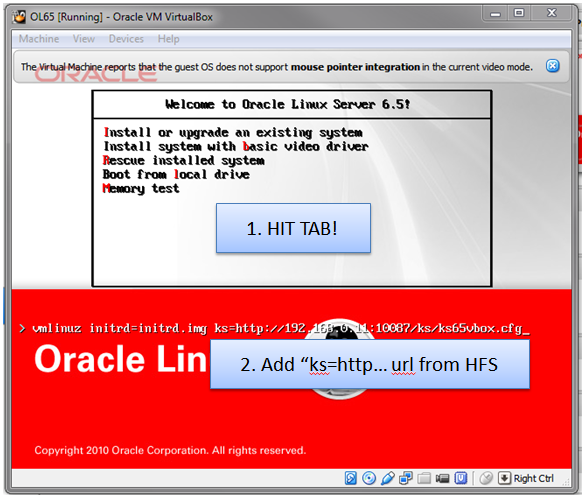
- Start the VM and hit the TAB button when you get the install screen.
Now, add to the options:
ks=http://192.168.56.1/ks66vbox-2disk.cfg
- Next select the first network card

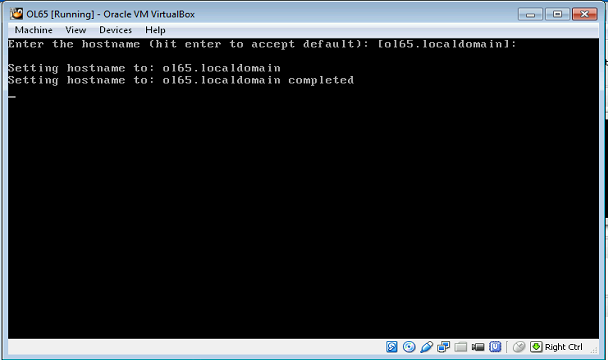
The kickstart config should ask for a hostname, hit enter to accept kickstart cfg default and move on. (image not updated for 6.6)
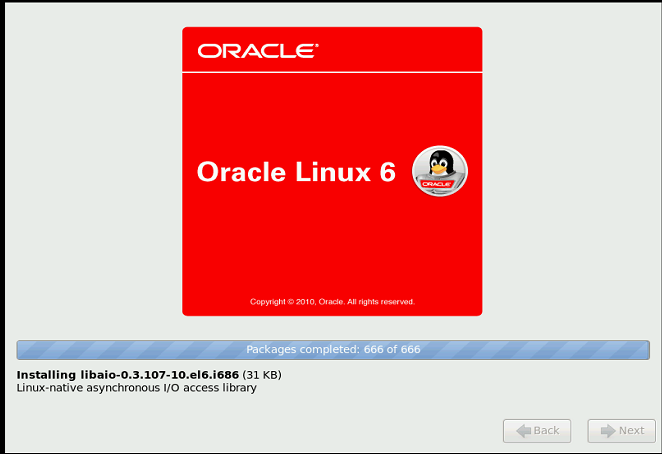
- The installation should commence and about 705 packages will be installed.
- After packages are installed, the post install script should kick in and setup the following:
- Add 'oracle' as a sudo user
- Create /opt/oracle and chown to oracle
- Add vboxsf group to oracle (virtualbox shared folder group)
- Setup the RPMFORGE repository
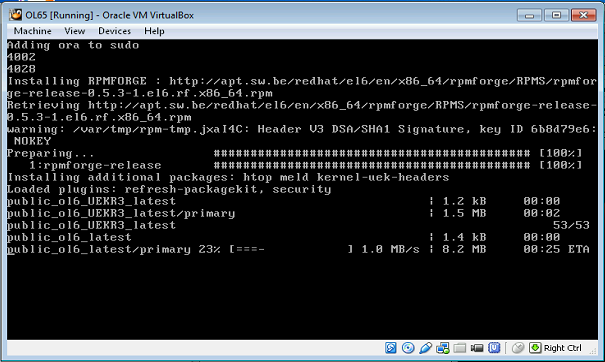
- Next it should install the packages htop, meld and the kernel headers. The kernel headers are important to setup the virtualbox tools.
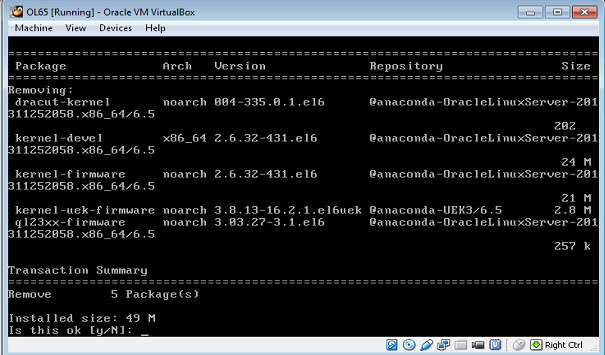
- Now, kickstart will remove some more unnecessary kernel items and some firmware items (enter a y)
- When the vm reboots it will still launch the installer, but you can safely poweroff the VM and remove the Oracle Linux iso from the drive.
Take it for a spin
You should be able to login as 'oracle' and password as 'password' which was setup in the kickstart file. Also, root password is 'password' as well. Again this is purely for a VM install for testing therefore there is no fear of an insecure environment etc. Also, ora user should be able to 'sudo'.
NOTE: Do not run yum yet. This will add about 300MB of downloaded index files and such.
Disable YUM Refresh!
Disable YUM refresh in preferences otherwise right after you login you will gain 300MB. Change the updates to "Never"
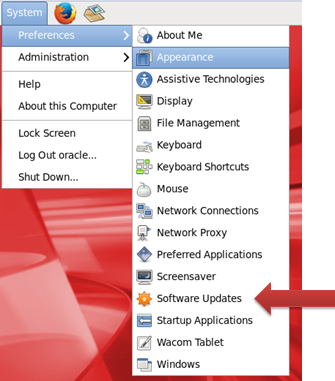

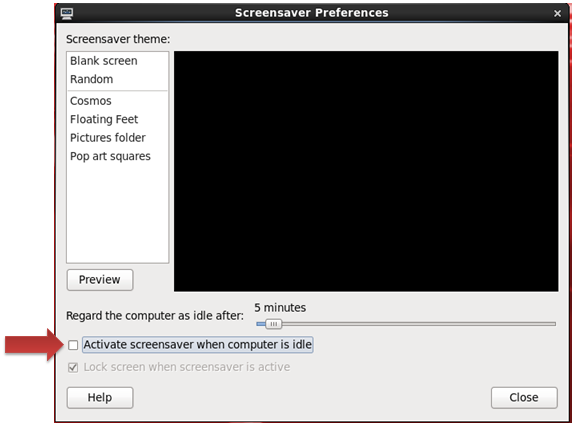
Screen saver is annoying in a VM. Disable it as well. Preferences>ScreenSaver
Shrinking the VM drive
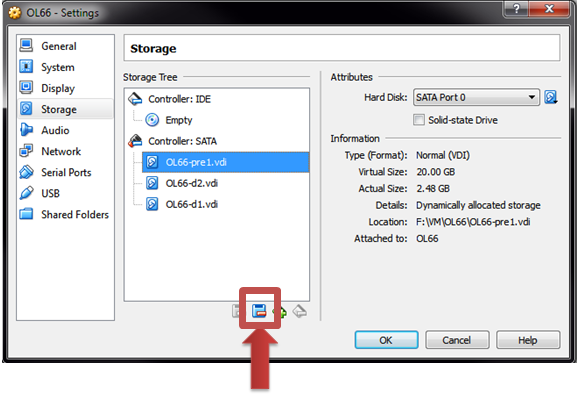
Now, setup the clonezilla iso in the drive. And add a new 20GB harddrive as shown below
- Add clonezilla in the drive
- Start the VM back up
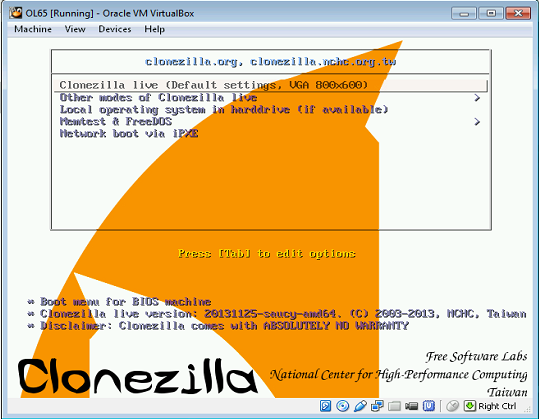
- Select defaults to get going

- Select device to device
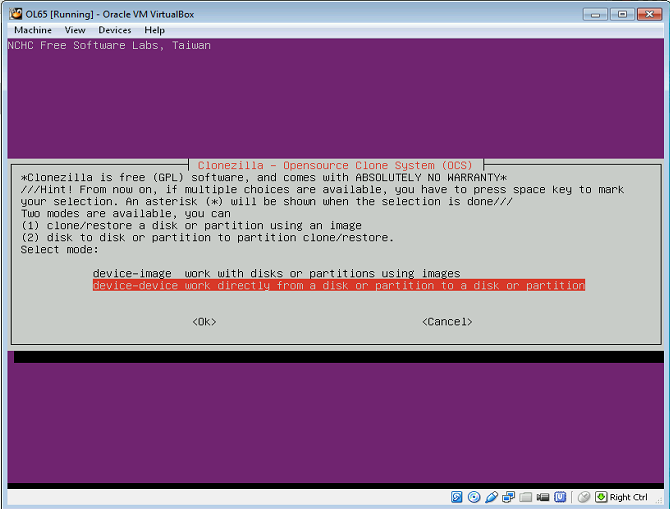
- Beginner mode is just fine

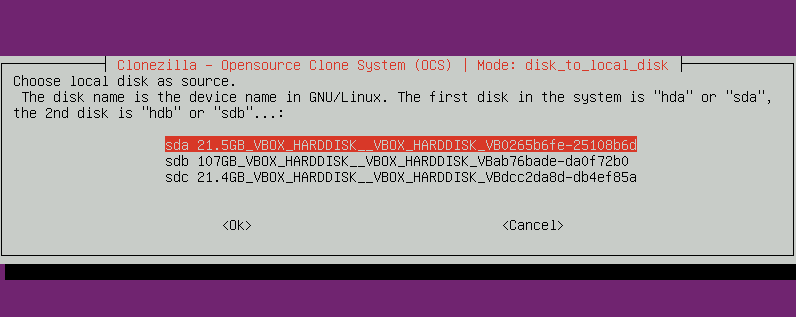
- Disk to disk

- Select first disk
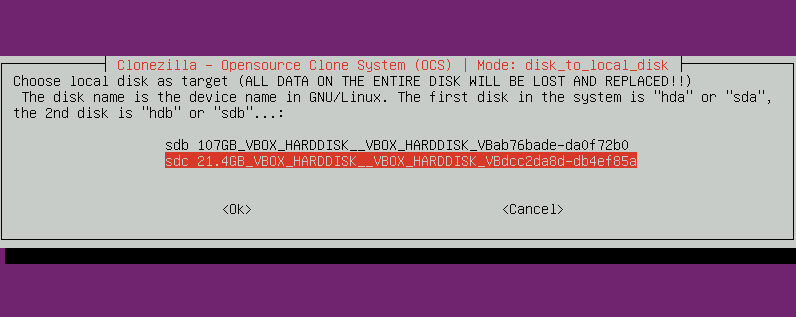
- Select second disk
- You can skip this, but if things fail, select the auto fix (I am truly lazy)
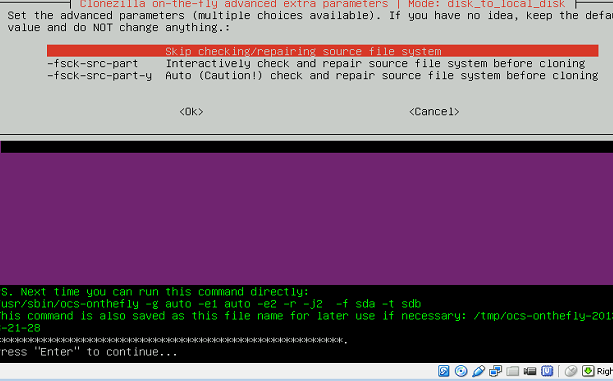
- yes, yes, and yes yes and yes.

- Choose 0 to Shutdown the VM after it is done.
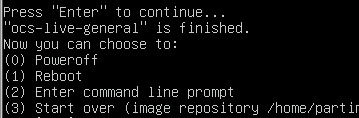
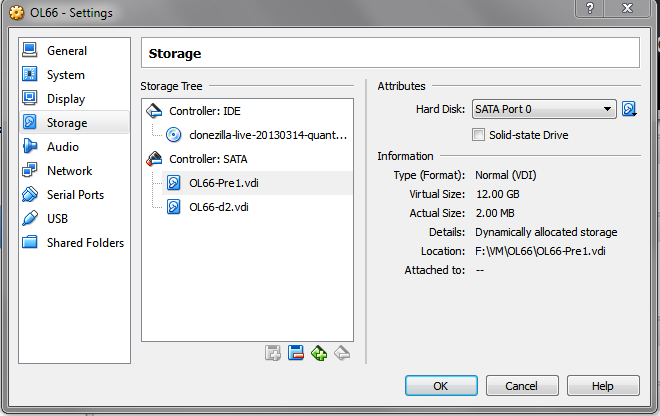
- And take a look at your handiwork

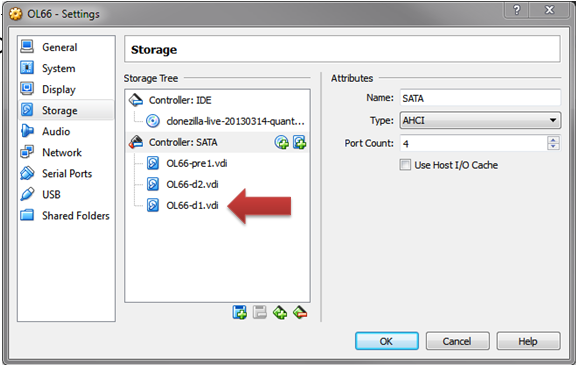
- Notice that the new disk is about 2GB. That is a solid 600MB savings. (I called my disk1 'pre1' and my final clonezilla disk 'd1')
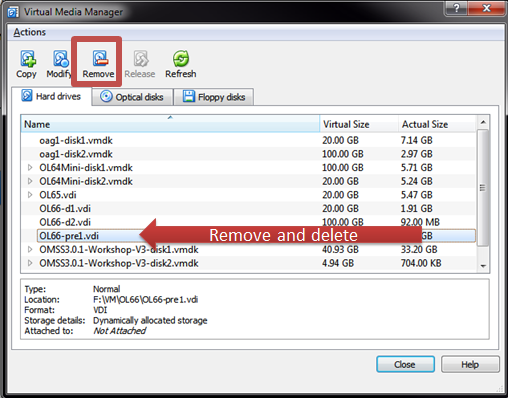
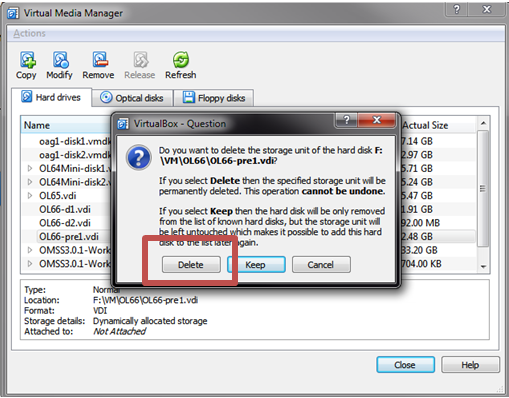
- You can now edit the settings and remove the original disk
The ova is compressed and is around 700MB
Hope you enjoyed that.
Hope you enjoyed that.

