Showing posts with label virtualbox. Show all posts

Sunday, September 15, 2019

NextCloud Experience

Goals

Primary goal, since I have a windows machine, is to install nextcloud so that the data directory is exposed in a windows directory.

I have a regular backup for the windows directory that takes care of failure situations.
It is not perfect, but I wish to avoid an in-vm or in-docker-volume data directory that keeps growing and rather have a share on which it is visible.
I suppose if I was ALL linux or ALL mac etc this may be less tricky.

Primary troubles:

1. Docker on windows: 
  • The amount of control on volume bind mounts from inside docker is limited.
  • Nextcloud is very particular about the data directory, it wants specifically 0770 permission owned by www-data.
Between these two I did not find a way to setup the data directory in a windows drive.

2. SQLite and windows shared folders: 
I like sqlite, for home use it is enough, I have been using it in owncloud for a few years without issues.
SQLite driver or whatever, seems to have a problem running in linux but accessing a windows mount.
For example, if you setup a linux in virtualbox, setup nextcloud, and if you share a windows folder and place the data directory, sqlite calls will fail.
So, either drop sqlite or place sqlite inside native volumes.

Solution

  • Virtualbox shared folder ownership:
    • Windows and docker cannot manage permissions volume bind so nextcloud fails.
    • Solution:
      • Run ubuntu in a virtualbox and override the uid,gid of Virtualbox shared folder using a simple fstab declaration.
      • Ubuntu has technically abstracted the drive as a linux drive with appropriate permissions.
  • Run Docker compose in ubuntu and bind mount the shared folder
  • Run postgres to avoid the sqlite pitfall. I really don't care about the db side since data is what I am worried about.

Tricky item:

When you first login to nextcloud it configures it as well. This also adds trusted host as to the ip you are coming in from.
If you launch browser from your *windows* host, then it is logged as trusted host.
This is good because otherwise it is fairly painful to edit the config inside nextcloud to add another trusted host as there is no admin UI for this.

Now you can place nextcloud behind nginx or other proxy before exposing it to internet - one more abstraction layer.

Outcome:

  • Windows host can now see the files users in my home are placing into the data drive and this is backed up regularly.
  • I can also share readonly shares of large libraries of music and videos across all the users.
Overall diagram:


The geeky bits:

1. Docker compose file. I cobbled this from the examples. Obviously password and host etc are to be configured to good security.

version: '2'

volumes:
    nc_root:
    nc_config:
    postgres_db:


services:
  db:
    image: postgres:alpine
    restart: always
    expose:
        - "5432"
    volumes:
        - postgres_db:/var/lib/postgresql/data
    env_file:
        - db.env
    networks:
        - mynetwork

  app:
    image: nextcloud
    networks:
        mynetwork:
            aliases:
            - nccloud.local.lan
    container_name: nccloud
    ports:
        - 8123:80
    volumes:
        - nc_root:/var/www/html
        - nc_config:/var/www/html/config
        - /media/sf_docker_nc_data:/var/www/html/data
    restart: always
    environment:
        - POSTGRES_HOST=db
        - POSTGRES_USER=postgres
        - POSTGRES_PASSWORD=password
        - POSTGRES_PORT=5432
        - POSTGRES_DB=nextcloud

    env_file:
        - db.env
    depends_on:
        - db
networks:
    mynetwork:
        driver: bridge

2. /etc/fstab entry to mount the shared folder with appropriate uid and gid. uid 33 and gid 33 are for www-data (which also happens to be provisioned by default in ubuntu with the same uid/gid combo).

docker_nc_data /media/sf_docker_nc_data  vboxsf uid=33,gid=33,umask=077 0 0


3. Added this to start and stop the service

# /etc/systemd/system/nextcloud-docker-compose.service

[Unit]
Description=Docker Compose Start of NextCloud
Requires=docker.service
After=docker.service

[Service]
Type=oneshot
RemainAfterExit=yes
WorkingDirectory=/home/nextcloud/DockerNC
ExecStart=/usr/local/bin/docker-compose up -d
ExecStop=/usr/local/bin/docker-compose down
TimeoutStartSec=0

[Install]
WantedBy=multi-user.target

Enable this with: systemctl enable nextcloud-docker-compose

4. Some reference commands that make life easy:

#follow logs when docker compose starts - good to see what is going on
sudo docker-compose logs --follow
# good for clean up and leave no trace.
sudo docker volume prune
#good for snooping around in the vm
sudo docker exec -it  nccloud bash

The end.

Friday, December 13, 2013

Create a full featured and compact oracle linux virtualbox VM in 15 minutes

Create a full featured and compact Oracle Linux Virtualbox VM in 15 minutes

AKA: “Honey, I shrunk my Linux”

Overview

Linux VMs such as Oracle Linux 6.6 start with an install footprint of about 5GB. This makes it inconvenient to hand off to other people and you are constantly looking for bigger drives to hold the VM in.

How about we just cut out all the bits that are irrelevant to a VM - such as bluetooth, printing, wireless, firmwares, additional kernels and the likes?
Here is one way to do it.
  • Get a list of rpms that is an absolute minimum
  • Create a KickStart configuration file
  • Host the kickstart cfg file on HFS or similar server
  • Now, copy the drive over using CloneZilla - which only copies occupied bytes.
  • All should be done in about half hour tops.

Pre install checks

Have the following ready:

  1. VirtualBox
  2. Oracle Linux 6.6
  3. CloneZilla: http://clonezilla.org/ has an iso that can be mounted to boot with.
  4. You can also use PartedMagic - which contains a copy of CloneZilla from http://partedmagic.com/doku.php?id=start#.UXhGlFeOOjg
  5. KickStart cfg file :

Notes about Kickstart: 

  • Kickstart file is sensitive to the CR/LF in the file. Make sure that the file is saved as unix LF only otherwise the shell commands within will fail. 
  • Another user called 'oracle' is setup by the installation of the oracle-rdbms preinstall package.
  • The kickstart cfg will:
    • Allow you to set the hostname
    • Set the root and oracle user passwords to 'password'
    • Setup the second drive as /opt
    • Create /opt/oracle and set the owner to 'oracle'
    • Add user 'oracle' to sudoers file
    • And importantly install only those bits that are needed.
  • The kickstart file also does not setup the logical volume. For things like clonezilla, partitionmagic etc LVM is just beginning to be supported or not supported. This keeps setup friendly and easy.
  • You can add a new hard drive once this is all done to host all your 'software'. This is a super simple step especially if you are not setting up LVM. It is just a simple mount setup in your fstab.
  • The 6.6 Kickstart file uses 2 disks. Other than that all instructions are identical.

Installation:

Setup a new VirtualBox VM and pre-install steps

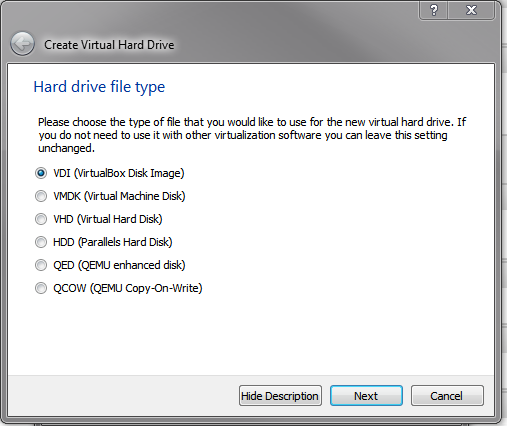
  • Create a new VM image for the Oracle Linux VM: (img. not updated for 6.6)https://blogger.googleusercontent.com/img/b/R29vZ2xl/AVvXsEg5f5U9bCAlWw7hrFQ7OHc1cixRcheFPu1J5AcblpfnFVdAsxvISNs0PVTJ0N5GRUYkQjp4rpWZR2mbWvtvO8qj_-ruK-97sjsrvDEwBn9LlzY6oFZ9jyT0LBopKCiCRABWKkA5-weWwdk/s1600/ol65.PNG
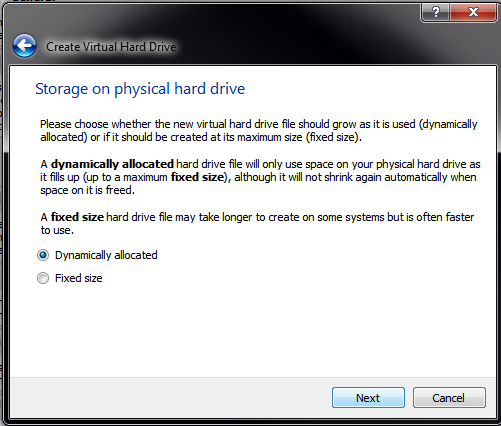
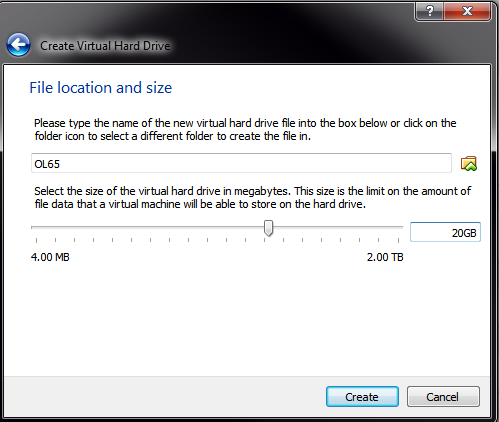
  • Setup a single dynamically allocated 20gb drive. AND one 100GB drive. The 100GB drive will be mounted as /opt/
https://blogger.googleusercontent.com/img/b/R29vZ2xl/AVvXsEioomJYmt8CZTs6uxDSnnNgowm8hsby1qdzFUZxPzlJdh5lb0mrKNAORC-9DMtYzU_t-L0nnIHCjNxmtRiV8rBMCwbuB3UTUswfrsetBXj59ZSMRx3I0MFUOAwxyvq5OZ0_YPn4M9KkezM/s1600/disk1.PNG

https://blogger.googleusercontent.com/img/b/R29vZ2xl/AVvXsEhAjH29w6g9eft2aWl0Qwix_4G6VR6-mOw5SuIppSrQ4CB7FoUF4or7wUloGvGHOwoIvgFrnwoM4jgXbjaZ9-MVj0qCzbAlcNGa-lBI56Y4ttYM9BNAS_u0lLInaWg1NAVNtdD77PblrTM/s1600/disk2.PNG

https://blogger.googleusercontent.com/img/b/R29vZ2xl/AVvXsEhsWM-K0w9ykLxh4w2xc8gAAmKfsBx_iSwKODNoFajxbqpaMMiULV5hMGGwq3bvKycbEVaRy1-nroTOE5px4DXpy0M5nv3Zgk2GP9GcRstUqltc28gJEvosAHYGifaYQ6G7oXUtVIFi0Og/s1600/disk3.PNG
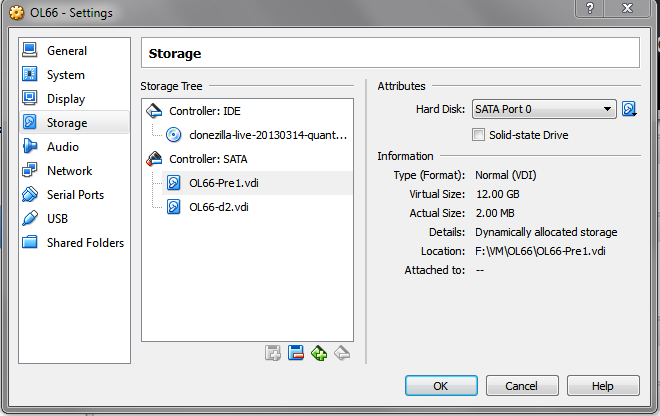
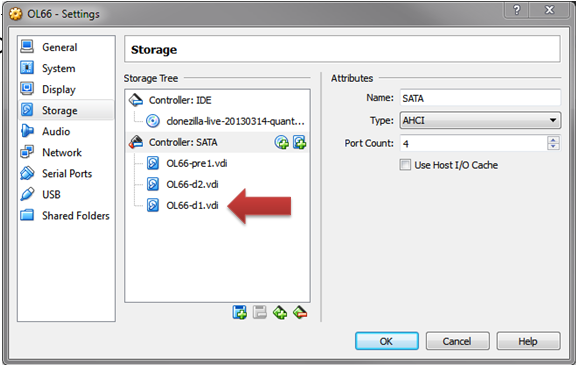
  • I have started calling the first disk “Pre” since it will be swapped out by the skinny disk1 at the end of this process. I name the skinny one correctly as d1.
C:\Users\nnat\Documents\Devel\OpenSource\vmshrink\Documentation\2diskcfg.PNG
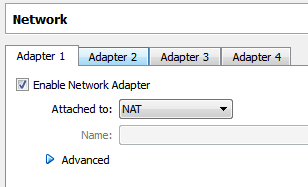
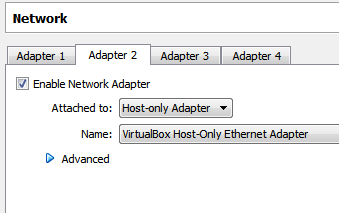
  • Setup 2 network adapters, one for VM to look towards the internet and one to allow your host to access the VM (VirtualBox does not provide the translation that VMware does and many posts use this configuration to setup the VM).
    • First network card is "NAT"
https://blogger.googleusercontent.com/img/b/R29vZ2xl/AVvXsEiaBWOSFORgfA_CUJXmbwimFtW8kAEXuk9acwoZ_7YCC_s2qpNLV2rppEkUsg8Z-BSDYxM1OONJ8tZI9VgW0SrWT3eMtzl8JyvSsGtzBvHxaoMV3_YEVofP-HQEpDlx2JJNosCLk3iyVIM/s1600/NAT.png
    • Second is "Host Only"
https://blogger.googleusercontent.com/img/b/R29vZ2xl/AVvXsEheT7zxsmtr77gQph3jOPUNhVeWluCfgVRVMp8w1oIaxfQEIQx-ST6dWCn45StmjuL8tjWEejyuMnI5U-ZF1faTyWDpVogjYBEd7jX43hp3ILYpFoKYWoEbkI-_oxrXQTqaMr8ku2CH_e0/s1600/host.PNG
  • Set the Oracle Linux ISO file in the 'drive'.
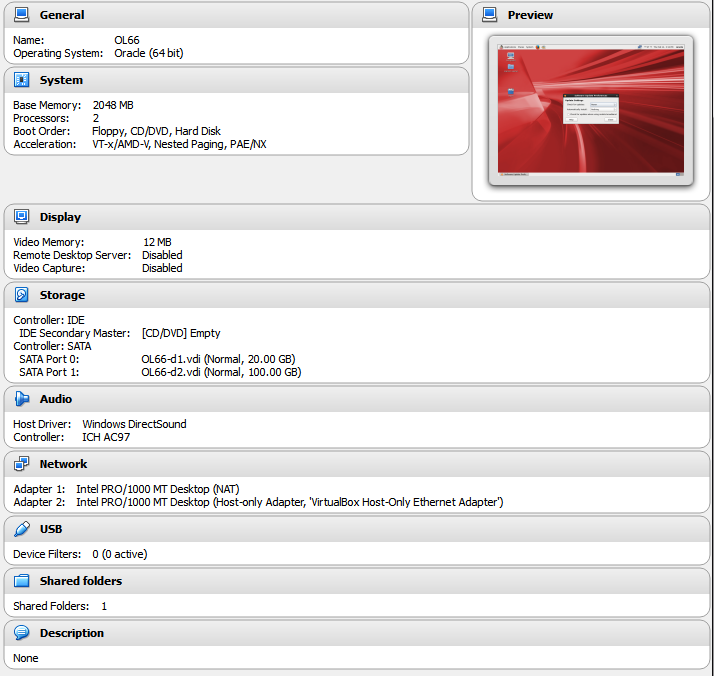
  • It should finally look like
    C:\Users\nnat\Documents\Devel\OpenSource\vmshrink\Documentation\finallylook.PNG
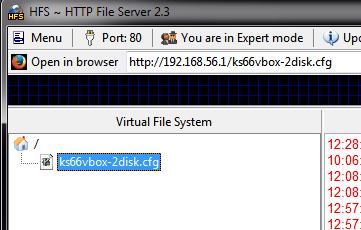
  • Start HFS
C:\Users\nnat\Documents\Devel\OpenSource\vmshrink\Documentation\hfs (2).PNG
  • Add the kickstart configuration file (drag and drop)
This completes the initial prep.

Installing Oracle Linux Using Kickstart

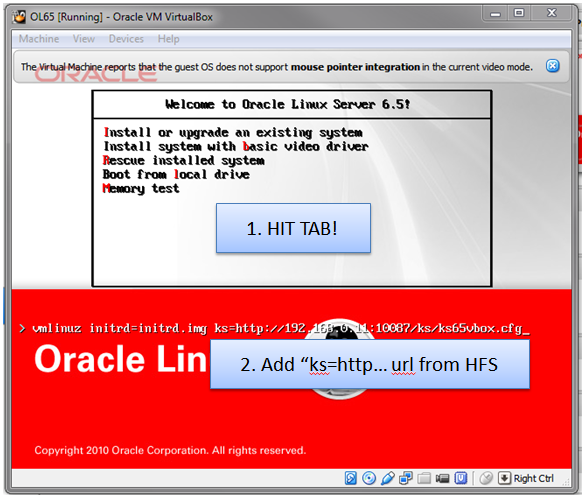
  • Start the VM and hit the TAB button when you get the install screen.
    Now, add to the options:
    ks=http://192.168.56.1/ks66vbox-2disk.cfg
https://blogger.googleusercontent.com/img/b/R29vZ2xl/AVvXsEiCwmSLK47WpqA1zsfPizYM3iTQVyGIN_S8NcSPU8WShaZc7tId88XYA_XMwJDjesAXDaUD-a-No9HMXRUFp1MqmlvxRlGFMOT39jkhR_GLTXPG7opL5WIA8yzTdEz7HyWa1rCpMadcyWw/s1600/hittab.PNG
  • Next select the first network card
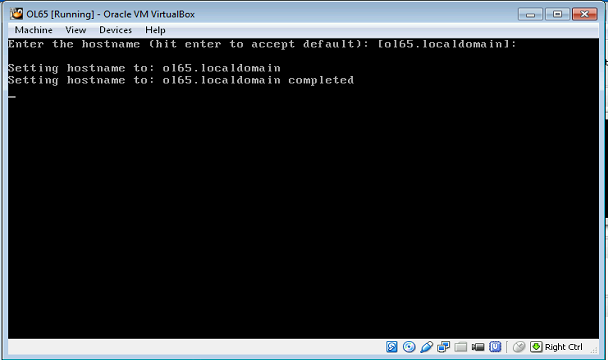
 The kickstart config should ask for a hostname, hit enter to accept kickstart cfg default and move on. (image not updated for 6.6)
C:\Users\nnat\Documents\Devel\OpenSource\vmshrink\Documentation\sethostname.PNG   

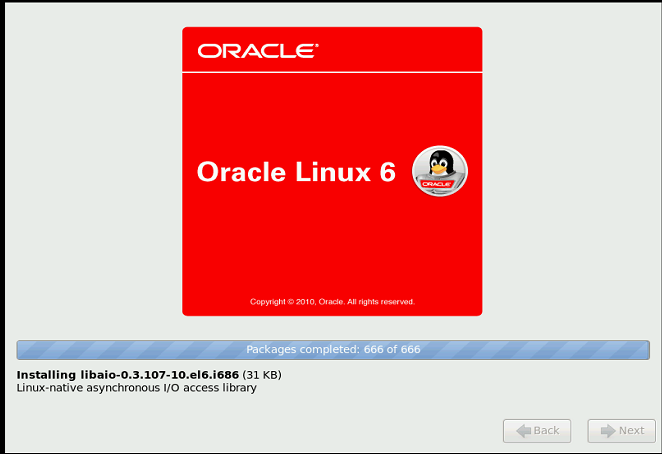
  • The installation should commence and about 705 packages will be installed. 
https://blogger.googleusercontent.com/img/b/R29vZ2xl/AVvXsEgN43mW2l52mOQuwDO8HUh8_IErB_Knf_pER4EOtuwXyBJZKO7NXd3Sw49QSz4En3sEmipdFV9oZrKHlvkmIsczGvBLwjdke5tJLQzM_ZRMNw7DJFiT6VDG6Ptgqr7pYDNZpxyZqCoUo0o/s1600/packageinstall.PNG
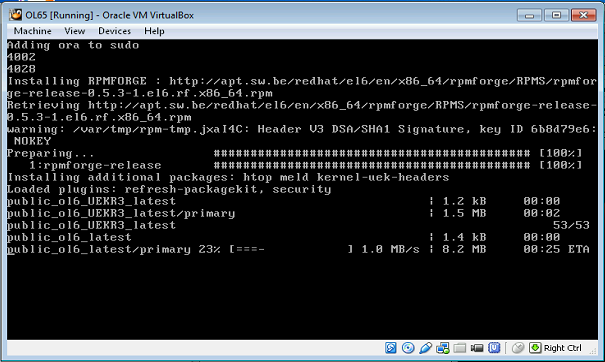
  • After packages are installed, the post install script should kick in and setup the following:
    • Add 'oracle' as a sudo user
    • Create /opt/oracle and chown to oracle
    • Add vboxsf group to oracle (virtualbox shared folder group)
    • Setup the RPMFORGE repository
https://blogger.googleusercontent.com/img/b/R29vZ2xl/AVvXsEinQrl68VmrwJMJmH6wy1zVTj5irFTtcfVQ5fdSD4sziYrhvz-YueA1r84yFAtyvVB2_8t9UN_RRSdzYGH17oGWSK7YUpmoY5v5n044lqfp6E5O8WwKjBNmN-mISvWBoLpAmYicHRPpk6I/s1600/rpmforge.PNG

  • Next it should install the packages htop, meld and the kernel headers. The kernel headers are important to setup the virtualbox tools.
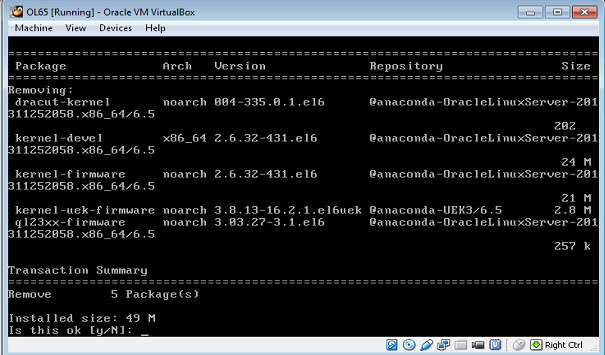
  • Now, kickstart will remove some more unnecessary kernel items and some firmware items (enter a y)
https://blogger.googleusercontent.com/img/b/R29vZ2xl/AVvXsEgKtIyWGpy4V6lM0CyBtxLSQ8bn43qcUeMKONw_hgt6bwoT3qUpp6RAKd8GlJeVy3xNhAF8bD4RbyR157kkP4CcN-NBaFCLy4xifr9TOlipaRBYp_13p4iiTC1gDN3b97zyJK-SUlXZx0w/s1600/removekernelpackages.PNG
  • When the vm reboots it will still launch the installer, but you can safely poweroff the VM and remove the Oracle Linux iso from the drive.

Take it for a spin 

You should be able to login as 'oracle' and password as 'password' which was setup in the kickstart file. Also, root password is 'password' as well. Again this is purely for a VM install for testing therefore there is no fear of an insecure environment etc. Also, ora user should be able to 'sudo'.

NOTE: Do not run yum yet. This will add about 300MB of downloaded index files and such.

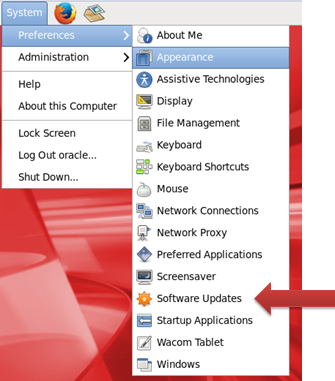
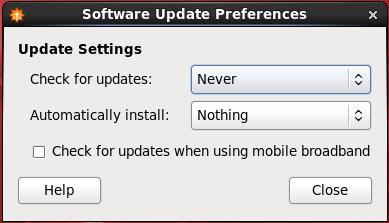
Disable YUM Refresh!

Disable YUM refresh in preferences otherwise right after you login you will gain 300MB. Change the updates to "Never"
C:\Users\nnat\Documents\Devel\OpenSource\vmshrink\Documentation\disableyum.PNG
C:\Users\nnat\Documents\Devel\OpenSource\vmshrink\Documentation\disableyum2.PNG
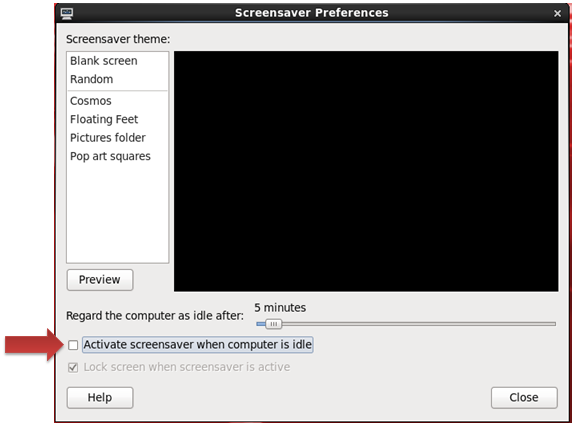
Screen saver is annoying in a VM. Disable it as well. Preferences>ScreenSaver
C:\Users\nnat\Documents\Devel\OpenSource\vmshrink\Documentation\disablescreensvr.PNG

Shrinking the VM drive

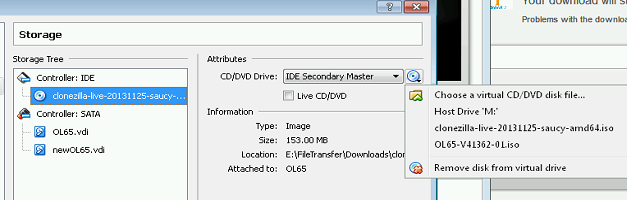
Now, setup the clonezilla iso in the drive. And add a new 20GB harddrive as shown below
C:\Users\nnat\Documents\Devel\OpenSource\vmshrink\Documentation\newdriveadd.PNG
  • Add clonezilla in the drive
https://blogger.googleusercontent.com/img/b/R29vZ2xl/AVvXsEjAuvAdOZNTGKYAiunZmKtXSBvD0LKG0EFxV-0bVnCxK24kzoolYQD2gIJ5-DKKCdhEyUVVIbBhTy5mMUD2wAaLwlzHNNdrFVNr0Jdw3kC-FBBKfv3Jur4CtfwKLALO86dmvqMP4cefqdU/s1600/clonezilla.PNG
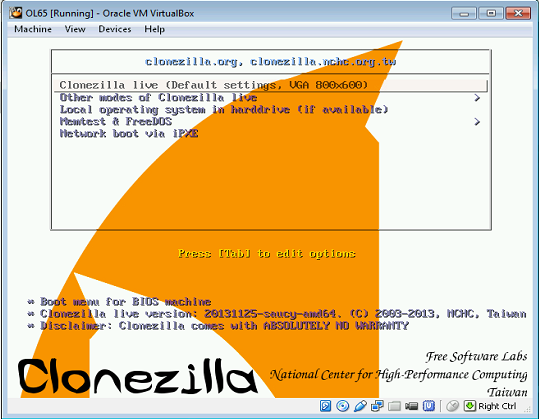
  • Start the VM back up
https://blogger.googleusercontent.com/img/b/R29vZ2xl/AVvXsEjLu8evthTsM13hTPJ77c-Cer-1PpRhSRjKHjLCSH5zHWEMXLkeMahrsXPECpWqpSfxdusda_ddgF9j2eNpdJCPW1hfStpWn5bH48Q95uCjkc8COtt3wtvd6ZIijWmT5Ci1MTuQPfitxns/s1600/cz1.PNG
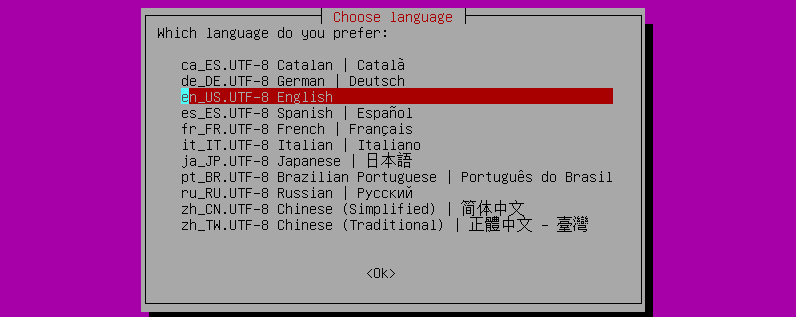
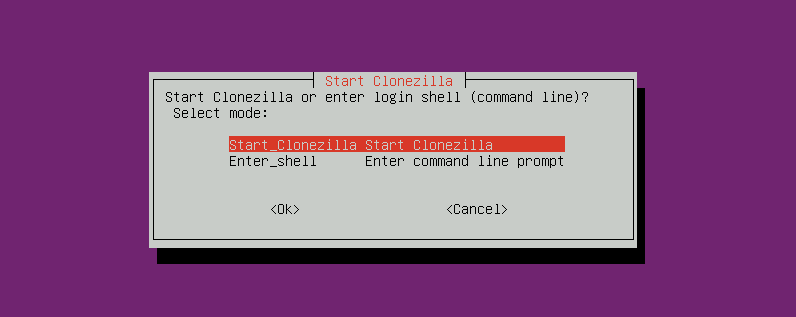
  • Select defaults to get going
C:\Users\nnat\Documents\Devel\OpenSource\vmshrink\Documentation\vmshrink_files\vmshrink0.png
C:\Users\nnat\Documents\Devel\OpenSource\vmshrink\Documentation\vmshrink_files\vmshrink1.png
C:\Users\nnat\Documents\Devel\OpenSource\vmshrink\Documentation\vmshrink_files\vmshrink2.png

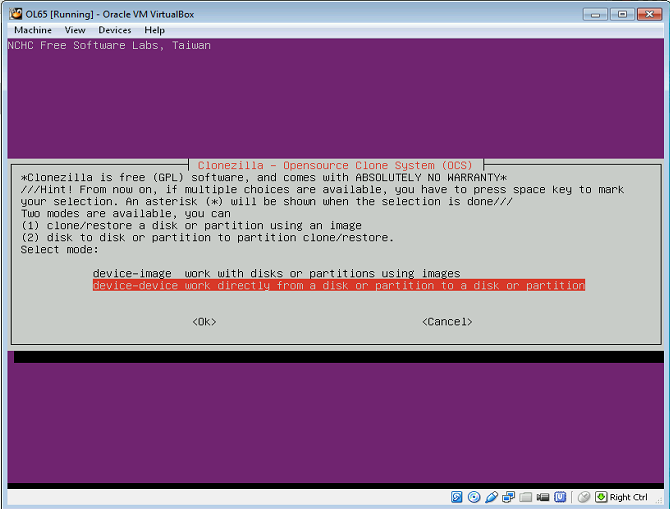
  • Select device to device
https://blogger.googleusercontent.com/img/b/R29vZ2xl/AVvXsEj7Go3p_gVNtzLbQ07N49dcXphWqXzky-pFnXFBoyN8yGNYZjg1S0bkDE0_9yE3szhx0qShecjq6x8E4GSpGgv6fp8sqQsZHvCt1Svfn9lVW6tbmkX0dUUBxz4inxYxKUutIq_ZFfqlDAg/s1600/cz2.PNG
  • Beginner mode is just fine
https://blogger.googleusercontent.com/img/b/R29vZ2xl/AVvXsEj8M4fHEnkGHbg31TKcBQ_FaUShM0C5xY4Dv129dhnWEXYyCCeiAlxICLpVlKBJITBKm3_J_sJI_5HuoVVSvay74iB7baT1oBS-o7JQiuGxeAwXL3P1tnb-GK6lGqWL12JdT96y-tAzdwc/s1600/cz3.PNG
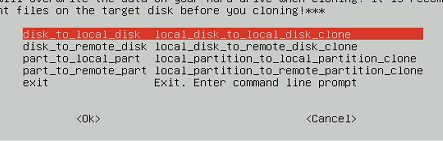
  • Disk to disk
https://blogger.googleusercontent.com/img/b/R29vZ2xl/AVvXsEiyRn7EUEI0q-ggvnUgrL8k3VM7820RzQmSZMVARXl7KSJGtd5-tic9Ryi8ryzsrQxVR8GAZvZZRmxypzhtz-RGJRSCJkmIbcUkQ2I2DiqvPtrB78ZSW8sps85_HuqIthNKIfBQXWyKtJ8/s1600/cz4.PNG
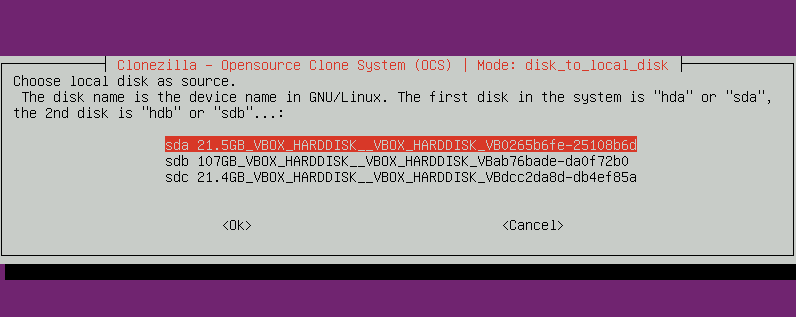
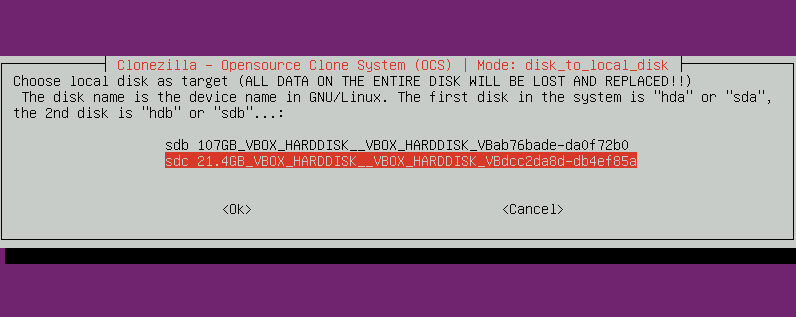
  • Select first disk
  • Select second disk
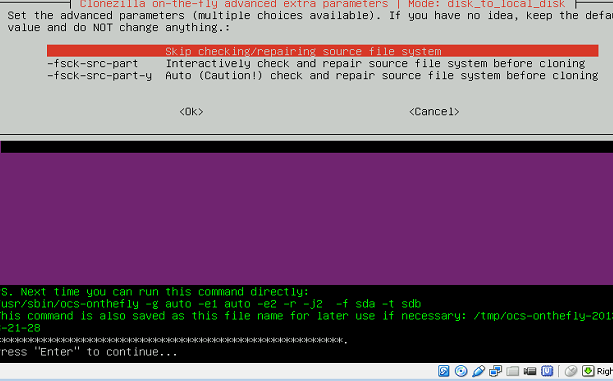
  • You can skip this, but if things fail, select the auto fix (I am truly lazy)
https://blogger.googleusercontent.com/img/b/R29vZ2xl/AVvXsEhq7Y4pXkmHVetHJU-2f29xUH7mrLPp1pinsLBsBpZNBAe90Tc_7pNhcGEsSCPfkeCGV1zhR6UJbV8TrdL2hcszu1p-N3Q5KADS6oHi2FvkVRbAXTmLf3psFPcE7zATUWwBl7MyT9HUnYc/s1600/cz7.PNG

  • yes, yes, and yes yes and yes.
https://blogger.googleusercontent.com/img/b/R29vZ2xl/AVvXsEgIONJwXCP886b3pD1VfkvxWOWpOn8j_nVPgGlOYbzadKW95E2FENCfT72qfpO7C-Kx1W1F-c8jSlrMK0AvVX2NLDK6xH0rwBFFCRF4rh66QdkAHTy6-7IQbEpMmjzNl2UaMwBEo7T_V1U/s1600/cz8.PNG

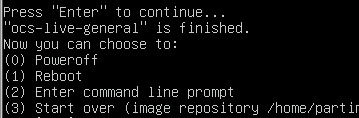
  • Choose 0 to Shutdown the VM after it is done.

  • And take a look at your handiwork
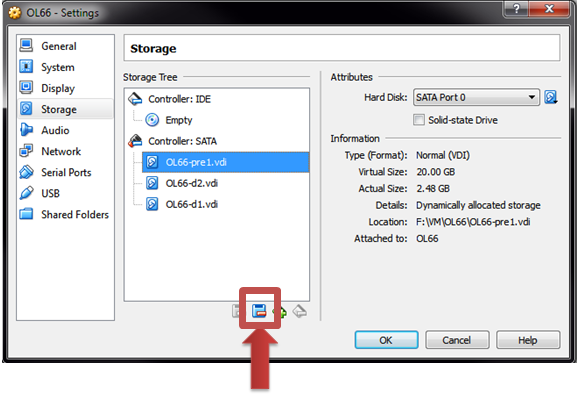
  • Notice that the new disk is about 2GB. That is a solid 600MB savings. (I called my disk1 'pre1' and my final clonezilla disk 'd1')
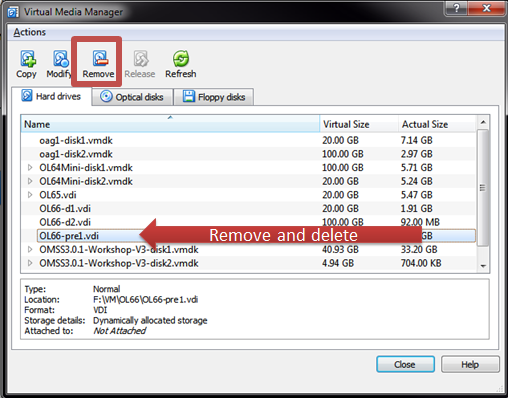
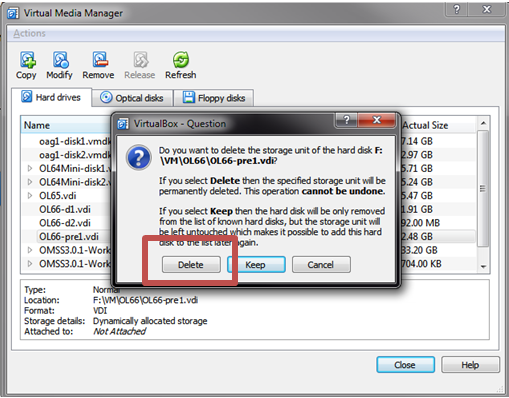
  • You can now edit the settings and remove the original disk

The ova is compressed and is around 700MB
Hope you enjoyed that.